Saturday, November 29, 2014

DIY Ikea Hack Lego Table

So anyone who knows my kids, knows how much they love Legos. It started with just one set and before we knew it at every birthday, holiday, or special reward we were amassing more and more Lego sets until we had reached a point where we must have easily over a thousand Legos... no joke. At first with each new set we didn't really notice all the new pieces because we would immediately build whatever it was... however as days would go by the "Creation" would be broken apart, rebuilt, repurposed, etc and before I knew it we literally had Legos everywhere and they were in complete chaos.... And of course whenever we would feel the need to make a new creation, we would have to dump all the Legos out in order to have a hope of finding just the right piece.

For a while now I've been trying to figure out how to better organize the Legos and give the boys a better space to play then their small play table or on the floor where pieces get lost in the carpet or inevitably end up being chewed on in baby's mouth even though he's not allowed in the room with the Legos (they have a way of traveling all over the house). So after watching the Lego Movie I was inspired to make an organized Lego space where the boys would have a large workspace and organization system... just like a Master Builder... So what does any inspired Mom do? She consults Pinterest. I found a ton of different ideas... but most were just converted train tables or were tables that had a large work space but didn't offer any organization. I finally found a few ideas that used these Ikea organizers and the ideas just started flowing.

The hubs and I went that very day to get the organizers and tubs and then went to Home Depot and got the materials we would need to build the table top. Some of the ideas I found just had the two cabinets backed up to each other, but I really wanted to give them an even larger table top. We got a large piece of particle board and had it cut to 48" by 44" and then also purchased some 1"x2" trim pieces. I consulted with the paint guy and got Gripper Primer and Behr Ultra paint. We built the trim around the cabinets and then attached it to the bottom of the particle board. I didn't want to attach table top directly to the cabinets in case we ever want to repurpose them for something else. This way the tabletop fits snugly to the cabinets and won't shift or tilt if the boys lean to hard on it. After we built the tabletop we sanded down the top and sides to make sure that the surface was smooth. I painted two to three coats of primer to really seal in all the pores and make the surface smooth. Then I painted about 3 coats using the Behr Ultra. I used a foam roller so that I wouldn't leave any fabric/lint strings in the paint. Eventually we will probably add a trim around the edge of the table to keep Legos from falling off the table.

To be honest building and painting the table was the easy part... the real "fun" came when it was time to organize all the Legos. This was after Day 1 of organizing. You can still see we have a large mountain of Legos. (And this didn't include already made creations or the pile the boys kept siphoning away to play with.)

The biggest challenge was keeping this little guy occupied while we were working. He'd only handle being in the exersaucer so long, so mostly we tried to work during his naps.
After 5 days we finally had all the Legos into designated bins. We basically sorted out all the bazillion teeny tiny pieces into the small trays that fit in our pre-existing lego organizer (that we outgrew at least a year ago). This shelf system is now designated just for the little pieces, minifigures, and all the minifigure accessories. Then in the new bins we sorted by size and function. We deliberately left some bins empty so that the boys could use them to store their "creations" or if they want to further organize by theme... ie Ninjago, Legends of Chima, Star Wars, etc.

Here's the final project! I did not label the bins yet. I want to make sure I have the boys input in naming each bin so that they can recognize what's written on the labels and can tell what's in each bin. I may add pictures to make it easier for Thing 2 to find what he needs.
 Right side bins
 Left side bins
 The table top is 48"x44" so plenty of room for building to occur.
Their play table chairs even fit in case they want to sit down.

The boys love working at their new table and I love that everything's not all over the floor. They are really excited that everything has a place (and therefor is much easier to find) so hopefully they'll keep it somewhat organized. I am however the mom of three boys and not delusional...so my hopes aren't too high with that.
My two master builders in the making

Wednesday, November 26, 2014

Happy Thanksgiving!

This Thanksgiving I am so very thankful for my family. I am thankful that despite all the madness going on in the world we are healthy, happy, and safe. Last night our photographer, Kellie, sent over a few pictures from our family holiday photo shoot we did last weekend, and I just loves how she always just captures the essence of us. She's been photographing us since before the boys were born and she has been there to see our family evolve. She just gets us and all our personalities and always finds a way to make them shine in the photographs she takes. Hope you enjoy these little teasers as much as I did. (It definitely made having to get up in the middle of the night with a fussy baby easier to tolerate when I found these waiting on my phone!)


(If you need a great photographer, Kellie Gillis of View the Big Picture is wonderful!!

Saturday, October 11, 2014

"Popcorn" Cauliflower Bites

Those that know my kids and their eating habits know that getting them to eat vegetables is darn near impossible. Tonight I finally found a winner! The original recipe I was following had these Parmesan Cauliflower Bites being fried, but I baked them in the oven instead and they were delicious and still crunchy. We renamed them Popcorn Cauliflower hoping it would appeal more to the Things and it did. They actually ate all their cauliflower before they even touched anything else on their plate! As Thing 1 said "Winner, Winner, Popcorn Cauliflower Dinner!" Hope you enjoy them as much as we did.


Ingredients:

  • I small head of cauliflower
  • 1/3 cup freshly grated parmesan
  • 1 1/4 cup Panko bread crumbs
  • 1 Tablespoon Emeril's Essence Creole Seasoning
  • 1/2 cup flour
  • 2 Eggs, beaten
  • Olive Oil Misto Spray
Directions:

Preheat oven to 375 degrees. Cut the head of cauliflower into florets. Combine the parmesan, panko, and Emeril's seasoning in a bowl. Dredge florets in flour, dip in egg, and dredge in breading mixture. Place cauliflower florets on a baking sheet. Lightly spray cauliflower with olive oil using a Misto sprayer. Bake for 30 minutes until golden brown. Enjoy!

Sunday, July 27, 2014

Biscuit Chicken Pot Pies

Summer sure has kept us busy. We spent a week visiting family and have spent the rest of summer running around to play dates and activities like swimming, ice skating, art classes, gymnastics, lil ninjas, ice hockey, jiu jitsu.... and the list goes on and on. I had all these high aspirations on being able to blog a lot this summer about different cooking and craft projects... but the reality is that by the time we finished the cooking projects, craft projects and daily activities, I was just too worn out to blog about our adventures! I'm not even sure how I found time to clean my house! lol! This is one of the recipes I made towards the beginning of summer but am now just getting around to post. The husband and I really liked it. The kids ate it too once they had picked out all the veggies... sigh... one of these days I'll get them eating vegetables again. The recipe I used was adapted from this Chicken Pot Pie Cupcake recipe.


Ingredients:
  • Two Chicken Breasts Cooked and Diced (we grilled ours)
  • 1 14.5 oz Can Cream of Chicken Soup
  • 1 Cup Frozen Mixed Veggies
  • 1 Cup Shredded Cheddar Cheese (I use reduced fat cheddar from block that I shred)
  • 1 Tbsp Italian Seasoning
  • 1 tsp Onion Powder
  • 1 Tsp Garlic Salt
  • 1 Tube Pillsbury Simply Biscuits
Directions:

Preheat oven to 400 degrees. In a large bowl combine all the ingredients (except for the biscuits)... chicken, soup, veggies, cheese, and spices.


Lightly grease muffin pan. Take each biscuit and flatten / stretch it out. Press biscuit into bottom of muffin tin and gently press it up sides of tin.


Fill each biscuit with chicken mixture.


Bake in oven for 15 minutes. Begin checking on Pot Pies after about 10 minutes to make sure they don't get overcooked.


Let cool down a little bit before serving, especially if Littles will be eating them. Enjoy!


Saturday, June 14, 2014

Cheeseburger Hot Pockets


My husband is gone a lot. I mean A LOT. He works 6 days a week and often gets held over and has to work overtime through dinner. On top of his "regular" job he also is in the Marine Corps and is often gone for that. This year alone he has already been at training 3 weeks and is currently doing 2 more. So my 3 Things and I are used to flying solo. For most of the day things are pretty easy and we just go with the flow... but I dread dinner time when the hubby is not at home. The big boys are always "starving" and it's usually the baby's fussiest time of the day (yes, he does get fussy). So I am always trying to come up with recipes that are easy and kid friendly that my boys will eat. Tonight, we hit the jackpot! We just got back from being up in the Pacific Northwest for the past week and the refrigerator was pretty bare. I had a can of biscuits, some cheese, and some ground turkey in the freezer... and Cheeseburger Hot Pockets is what I came up with!

Ingredients:
  • 1 lb ground turkey
  • 1 tsp Minced Onion
  • Lawry's Seasoning Salt
  • 1 can Reduced Fat Flaky Grands Biscuits
  • 8 slices cheese (I used Colby Jack)
Directions:
Preheat oven to 400 and spray baking sheet with nonstick spray. In a large saute pan add ground turkey, minced onion, and season with Lawry's Seasoning Salt. Brown turkey on medium heat until cooked through.

Split a biscuit in half and flatten out each half. Place meat mixture on bottom half, lay a slice of cheese on top of meat, and cover with top half of biscuit. Press down edges and use a fork to seal. Repeat with remaining biscuits, meat, and cheese. Pierce top of pocket with fork.

Bake for 10 minutes or until tops of pockets are golden.


Saturday, May 24, 2014

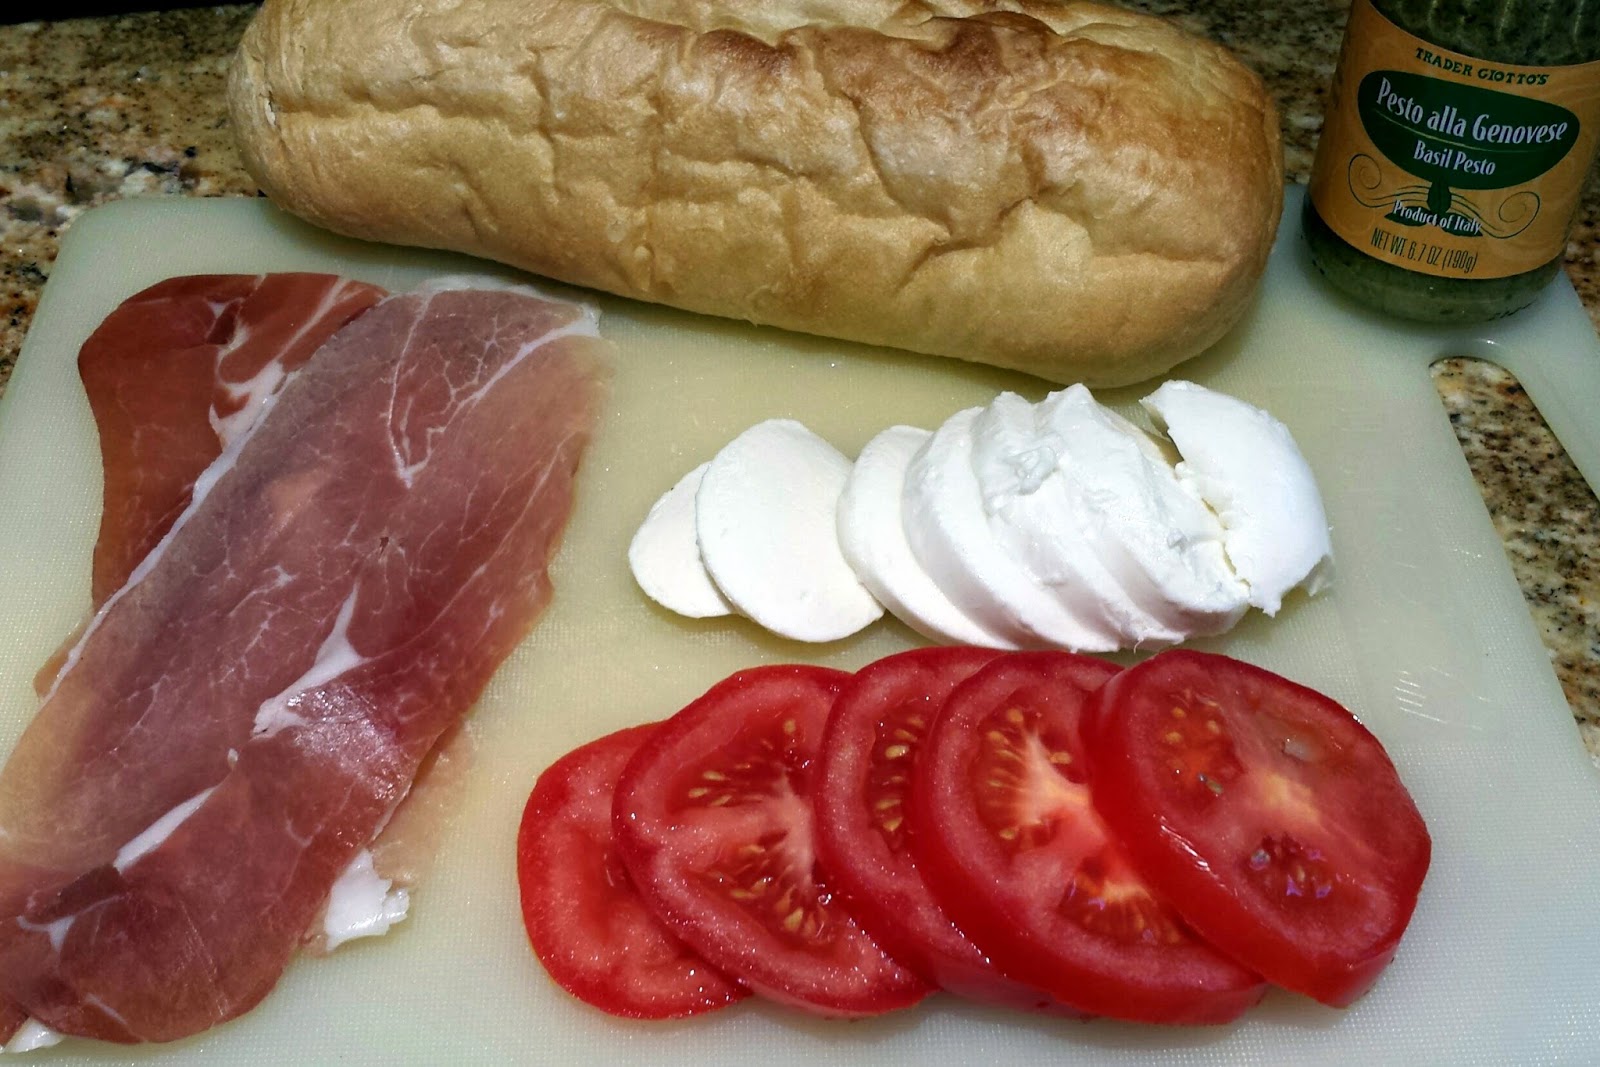
Prosciutto, Tomato, and Mozzarella Bruschetta


This is a great side or appetizer to add to any meal. It's one of those things that I just made up based on some ingredients I had on hand. My family loves it and whenever I have made it for dinner guests it has always been a hit. This is really easy and can be pre-assembled so all you have to do is throw it in the oven right before dinner is served. I typically use my toaster oven for this recipe.

Ingredients:
  • Fresh loaf of bread (ciabatta, french, sourdough, etc)
  • Pesto sauce
  • Prosciutto slices cut in half
  • 1 large tomato on the vine
  • 1 fresh mozzarella ball
Directions:
I typically slice my tomato first to see how many slices I'll get out of it and then that's how many slices of bread, mozzarella, and prosciutto I'll cut.

Spread a small amount of pesto on each slice of bread. The place one half slice of prosciutto on the bread. Next layer a slice of tomato, and then top with the mozzarella.

Place in toaster oven directly on rack. Turn oven on broil and cook until cheese is melted and starting to get a golden tint on top. Carefully pull out of oven, it will be hot!! Serve and enjoy!

Pork Tenderloin with Cherry Sauce


So between Thing 1's birthday, our Carlsbad/Legoland trip and then getting sick with a stomach bug, there hasn't been much cooking going on around here. Until today! Back before I "retired" from teaching to be a stay at home mom, one of my friends and coworkers shared the results from this recipe with my teammate and I at lunch one day. Let me tell you, it was delicious! We could not stop eating it and I just had to get the recipe from her. It came from the "Everyday Paleo" cookbook by Sarah Fragoso. I modified the recipe because my tenderloin was larger than the one called for in the recipe. No joke, this recipe is sooo good! And the pork doesn't get dried out at all. My kids just gobble it down too! So it is definitely a winner around here.

Ingredients:
  • 1 1/2 Tbsp olive oil
  • 2 1/2 lb pork tenderloin
  • Salt and pepper to taste
  • 2 cups chicken stock or broth
  • 1/2 cup balsamic vinegar
  • 1/2 lb dried cherries
  • 2 sprigs of fresh rosemary
Directions:

Heat olive oil in skillet on medium low to medium heat. Cut tenderloin in half so it will cook faster and more evenly. Season with salt and pepper. Place tenderloins in skillet and brown on all sides. It should have a nice golden brown color. Add chicken stock, blasamic vinegar, cherries, and rosemary. Continue cooking in skillet for about 30-35 minutes turning the tenderloins periodically.
While the tenderloins are cooking, it is the perfect time to prep some of my Prosciutto, Tomato and Mozzarella Bruschetta to accompany the tenderloin.

Remove tenderloins and cover with foil. Continue cooking the sauce in the skillet until stirring continually until it has a syrup consistency (about 3 minutes). Discard rosemary. Slice tenderloin and pour cherry sauce over top. Serve and enjoy!!


Sunday, April 27, 2014

Grandma H's Cereal Snake


Another one of my summer favorites from spending the summers in the mountain with my grandparents was "Cereal Snake". This is basically homemade chex mix, but it's called cereal "snake" because when my Dad was a kid, his cousin spelled it "snake" instead of "snack" in a letter he had written. Of course he was only 6 or 7 at the time... but "snake" stuck and so the "cereal snake" tradition continued on when we were kids.

I can still remember how good this smelled cooking in the oven and we always looked forward to having a little bowl of it every afternoon during the summer. I plan on making it this week for a playdate I'm doing for Thing 1 and some of his friends. I sure hope they like it as much as we did!

Ingredients:
  • 1 stick butter or margarine
  • 2 tbsp canola oil
  • 5 tsp Worcestershire sauce
  • 1 1/2 tsp Laury's seasoning salt
  • 1/4 tsp garlic powder
  • Just a splash of Tabasco sauce
  • 2 2/3 cups cheerios
  • 2 2/3 cups wheat Chex
  • 2 2/3 cups rice Chex
  • 1 cup stick pretzels, broken in half
  • 1 cup pecans or other nuts or bagel chips (if you want to make nut free)
Directions:
Melt butter. Add canola oil, Worcestershire sauce, seasoning salt, garlic powder, and Tabasco sauce.

In a separate bowl mix cheerios, Chex cereals, pretzels, and nuts. Pour butter mixture over cereal mix. Gently toss to coat over all the pieces.
Pour mixture on to a rimmed baking sheet. You can line your baking sheet with foil to make clean up easier. Bake in a 250 degree oven for 1 hour, stirring every 15 minutes.

By the way my Things loved helping make this recipe!


Sunday, April 20, 2014

Grandma H's Dump Cake


So it's Easter today and we really don't have any plans. For the first time in weeks we don't have to get in the car and drive anywhere. It's actually kinda nice. I'm getting laundry and dishes done and just spending time relaxing. So as is the norm when I'm sitting around doing nothing, I get a hankering to do some baking.

When I was a kid I used to spend my summers at my Dad's parents house up in the mountains in California. The lived in a little town called Meadow Valley outside of Quincy. Grandma H (otherwise known as Grandma Doggy) was always cooking and baking. One of my favorite desserts she used to make is soooo yummy and soooo easy to make. Of my Three Things only Thing 1 ever had a chance to meet his Great Grandma before she passed away 4 years ago. So I like to be able to cook and make her recipes to keep a little piece of her specialness a part of my boys life.

So on account of the fact that it's Easter I thought I'd make something special today and Grandma's Dump Cake seemed to be calling my name. The only problem... I don't have any ingredients on hand, so it looks like we'll be making a quick trip to the store afterall! ;)

This recipe is a pretty standard Dump Cake recipe and it comes out great every single time! I have only very minorly modified it by adding in just teeny bit of vanilla extract. The best part about it is that it is so easy to make that my Things can help make it too.

Ingredients:
  • 21 oz can blueberry or cherry pie filling
  • 8 oz can crushed pineapple (the can pictured is a 20 oz can because they were on sale and it was cheaper to buy that then the 8 oz. I just measured out 8 oz)
  • 1 tsp Vanilla extract
  • 1 box yellow cake mix
  • 1/2 cup chopped nuts (walnuts or pecans work great)
  • 2 sticks unsalted butter or margarine
Directions:
Preheat oven to 350 degrees. Spray 9 in square pan with baking spray.

Spread ingredients as they come from the box or can in order listed above (pie filling, pineapple, vanilla extract, cake mix, and nuts). Top with butter or margarine that has been cut into marble sized pieces.

Bake for about 40 minutes.

And that's it! You're all done. When top is golden brown take out of oven and cool in pan on cooling rack.